Navigating Arbo Software
Welcome to the knowledge base for Arbo! We've created a helpful guide to assist you in navigating Arbo, your new Finance sidekick.

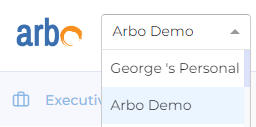
Arbo Spaces
As a user, you are assigned two different spaces in Arbo
- Company Space: Add a description
- All of the FAQs below are for Company
- Personal Space: Add a description
- Separate section for Personal spaces and taxes
Executive Summary
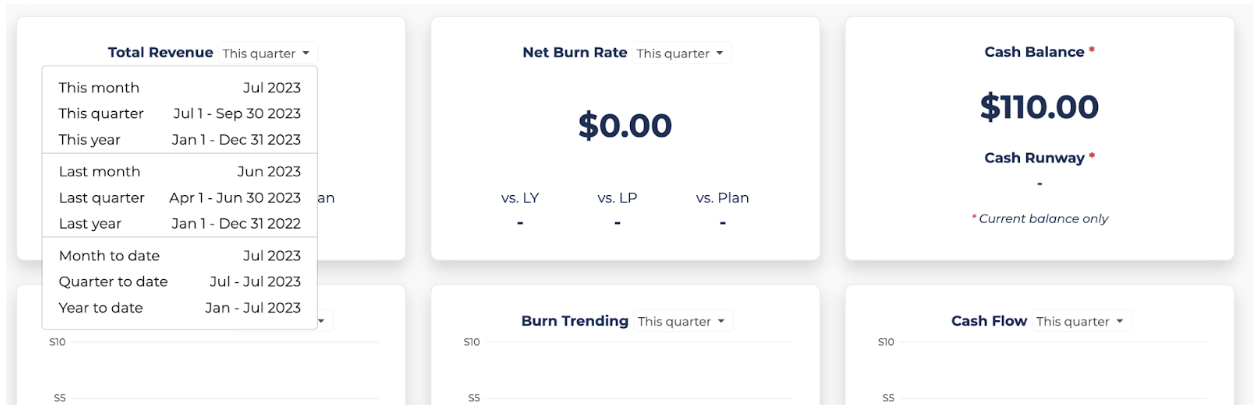
The Executive Summary Page Highlights your startup's Top 9 Key Metrics in an easy-to-view dashboard.
- Total Revenue | Revenue Trending
- Net Burn Rate | Burn Trending
- Cash Balance | Cash Flow
- Expenses Trending | Top Expenses
- Credit Card Balance
- How do I change the timeline for the summary page on Arbo?
- When you login into your account on Arbo, at the left of your screen, select “Executive Summary”
- The dashboard will open up, select the drop-down on the top right for each block “this year”
- Click on the desired timeline
- All timelines for tiles will change
- Return to the same dropdown on any tiles to revise
Accounting
- How do I categorize transactions on Arbo?
- When you login into your account on Arbo, at the left of your screen, amongst all the options, select “Accounting.”
- The submenu will pop up, select “Transactions.”
- The list of transactions from every account you connected will appear on the screen, enter the payee (i.e., the company/person who sent the amount to you or the person who will receive the amount you sent)
- Afterward, enter the category according to the charts of the account the transaction belongs to.
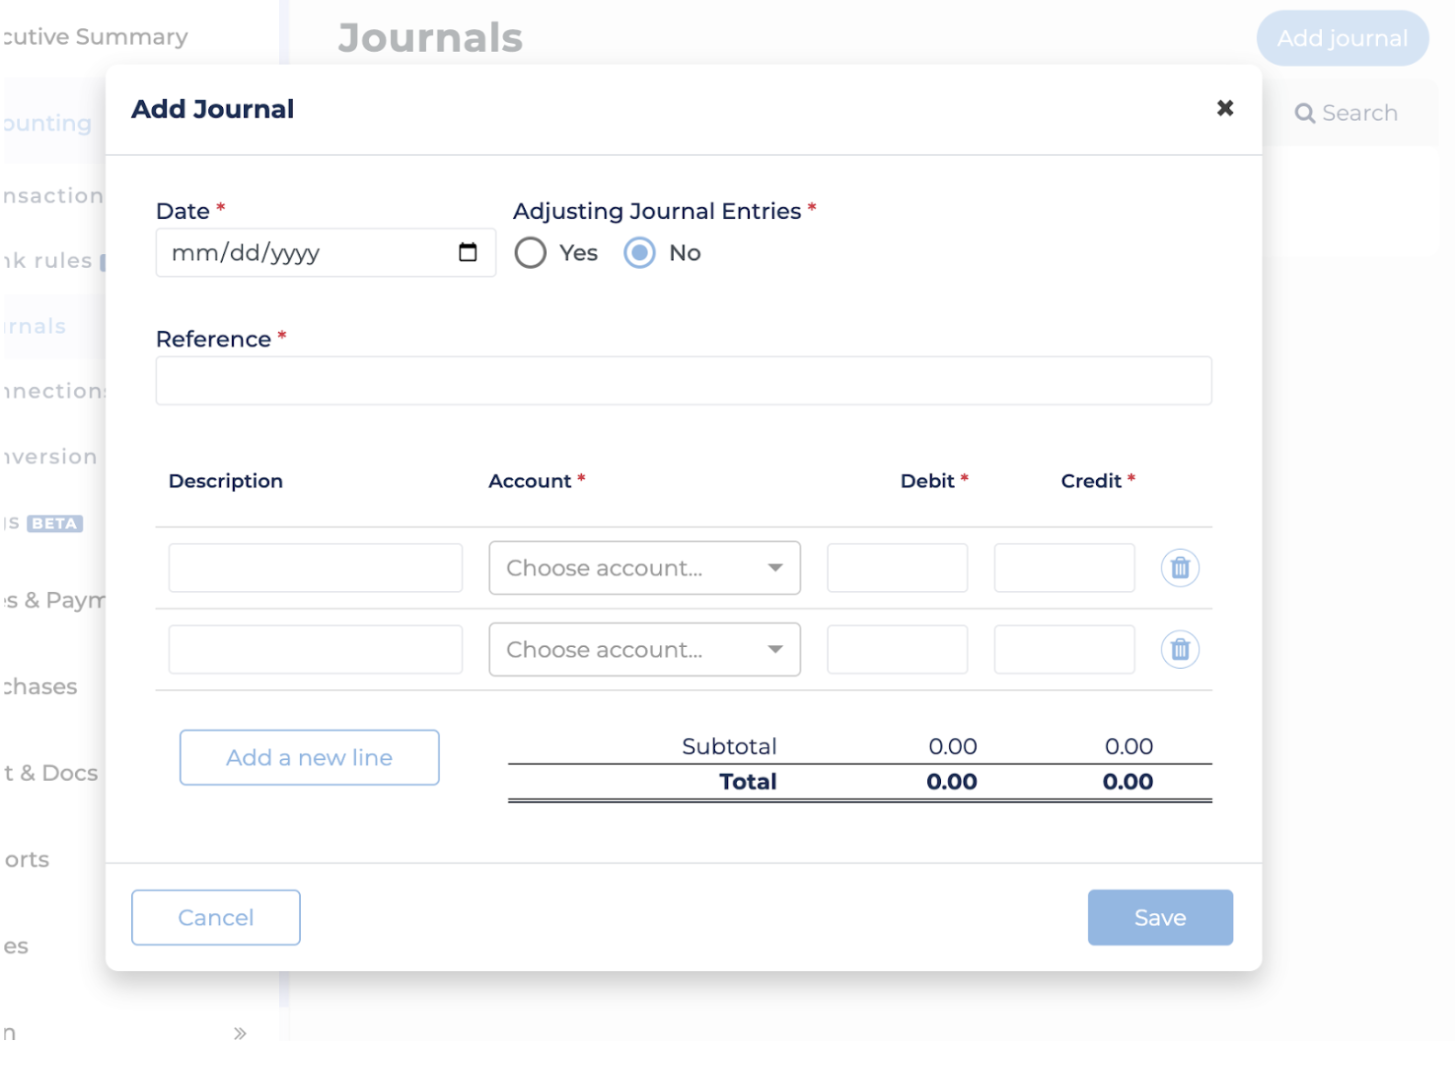
- How do I create journal entries on Arbo?
- When you login into your account on Arbo, at the left of your screen, select “Accounting.”
- The submenu will pop up, select “Journal.”
- Click on “Add Journal” at the top right of your screen
- Enter the required details according to your need.
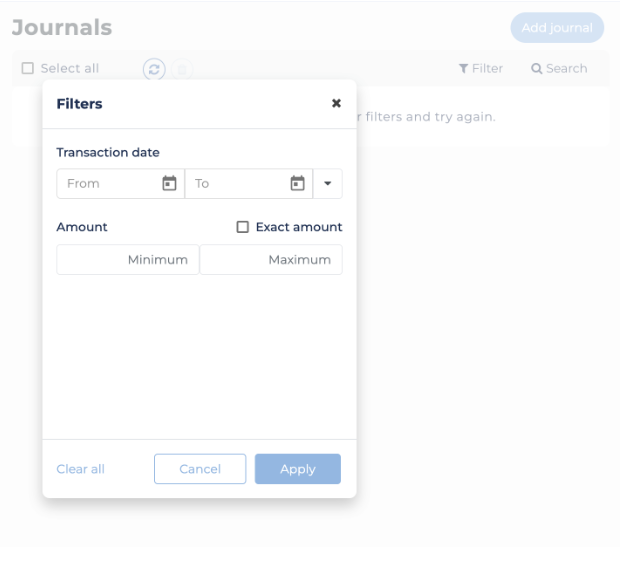
- How do I filter journal entries on Arbo?
- When you login into your account on Arbo, at the left of your screen, select “Accounting.”
- The submenu will pop up, select “Journal.”
- Click on “Filter” at the top right of your screen
- Enter the required details according to your need.
Connections
- How do I connect bank accounts on Arbo?
- When you login into your account on Arbo, at the left of your screen, select “Accounting.”
- The submenu will pop up, select “Connections”
- Click on the desired form of connection at the top of your screen
- Enter the required details according to the prompt.
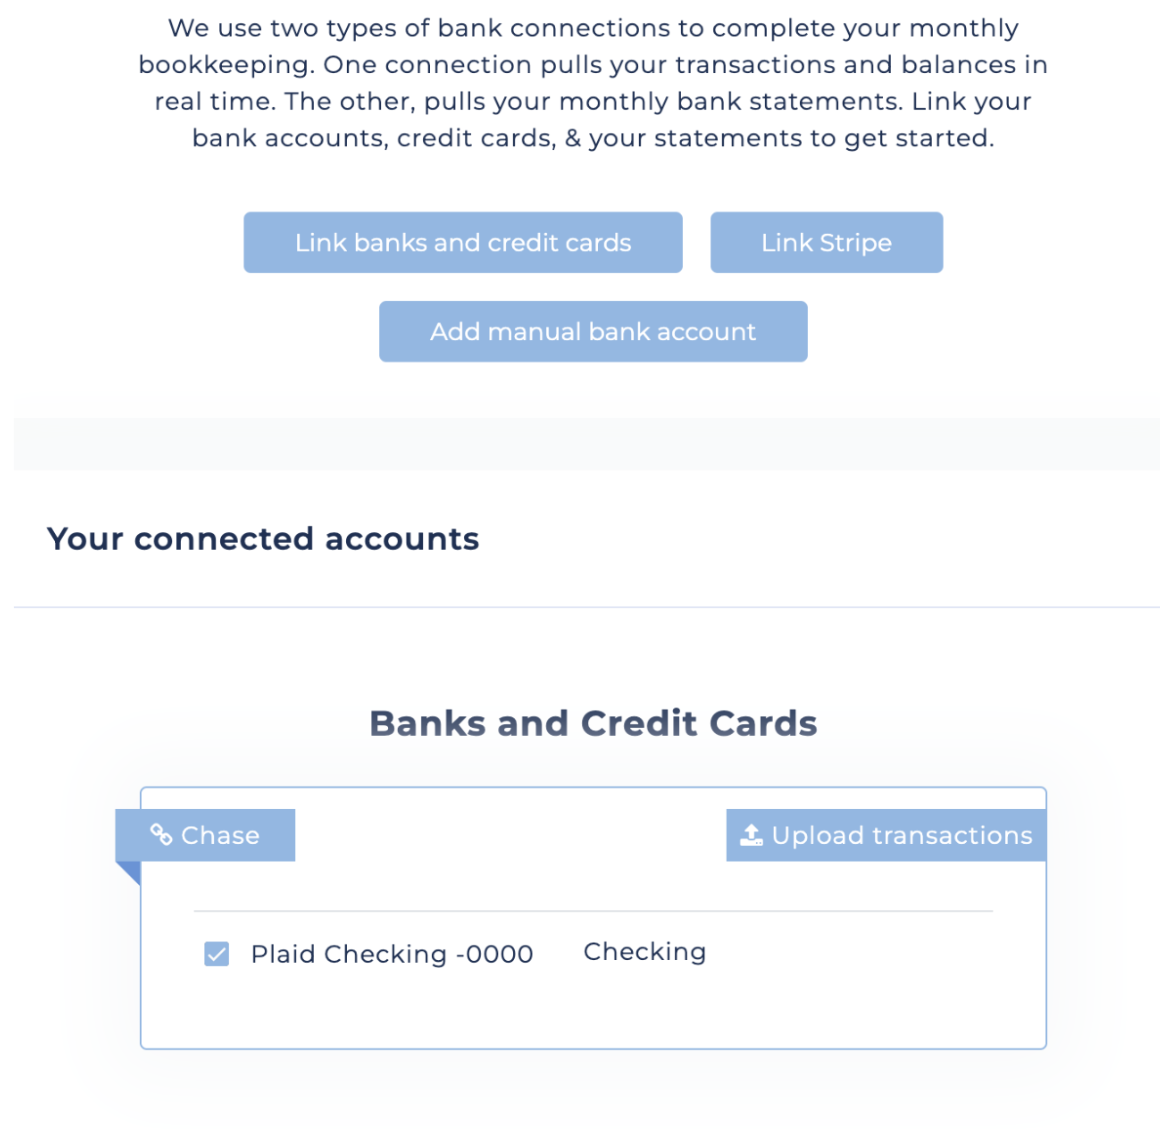
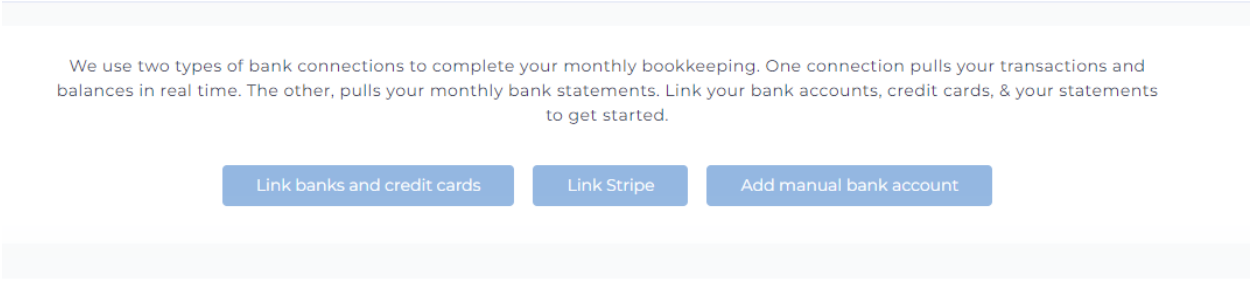
- How do I link my bank account, stripe, and credit cards in Arbo?
- When you login into your account on Arbo, at the left of your screen, amongst all the options, select “Accounting.”
- The submenu will pop up, select “connections.”
- There is the option to add manual bank accounts, link Stripe and link banks and credit cards.
- How do I handle bank transfers between my connected bank accounts?
- For bank transfers, you must ensure that both accounts participating in the transaction are connected to Arbo.
- When you login into your account on Arbo, at the left of your screen, amongst all the options, select “Accounting.”
- The submenu will pop up, select “Transactions.”
- The list of transactions from every account you connected will appear on the screen, enter the payee (i.e., the company/person who sent the amount to you or the person who will receive the amount you sent. ).
- When you arrive at the transaction that was a transfer, in the category box, begin to type “Bank Transfer”

-
- Select “Bank Transfer”
- A screen will appear, prompting you to select a matching transaction. You want to ensure that the dates of the two transactions align.
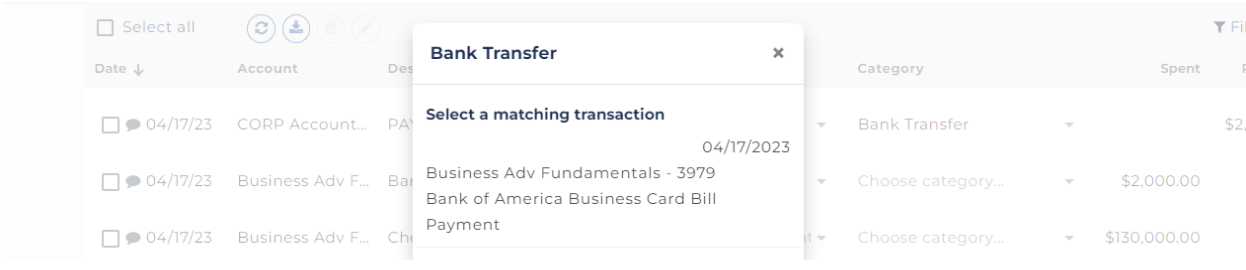
-
- Select the matching transaction.
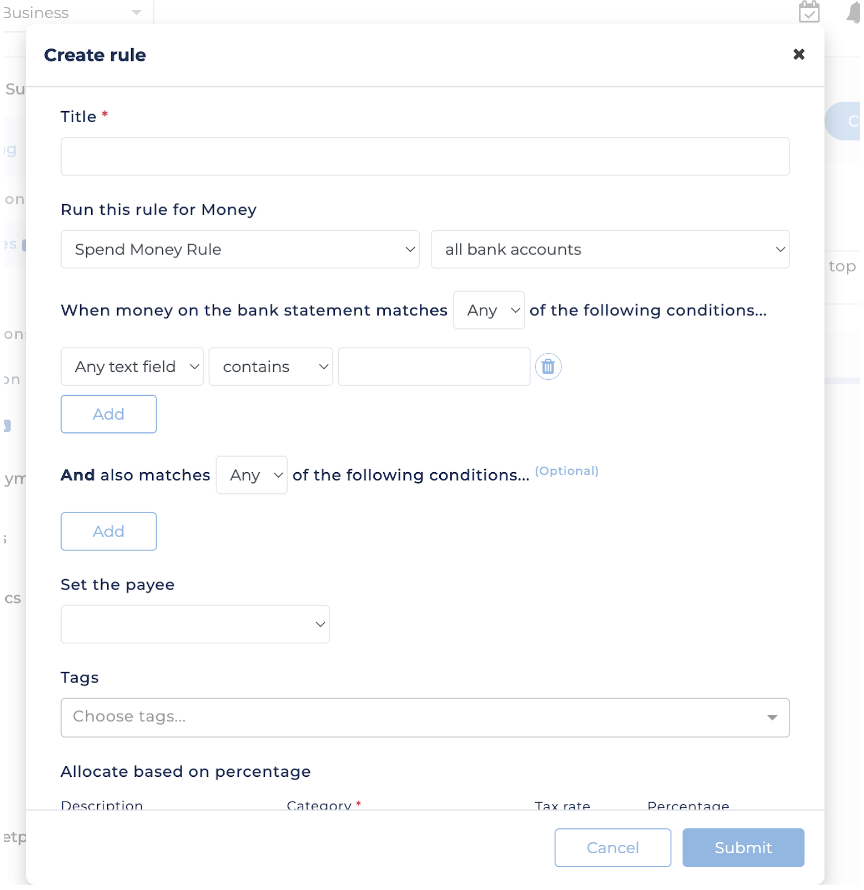
- How do I create bank rules on Arbo?
- When you login into your account on Arbo, at the left of your screen, select "Accounting."
- The submenu will pop up, choose "Bank rules."
- Click on "Create a rule" at the top right of your screen and customize the rule according to your preference.
- What is the conversion date on Arbo?
- This is the date that you decided to start using Arbo as your accounting software
- This date plays a role in calculating your conversion balance from your previous accounting software and forward-looking balances in Arbo
- This date is a crucial entry once you connect your bank accounts to Arbo
- How do I access the conversion date on Arbo?
- When you login into your account on Arbo, at the left of your screen, select "Accounting."
- The submenu will pop up, choose "Conversion balance"
- Click on "Conversion Date" at the top right of your screen
- Add relevant details and submit
Sales and Payments
- Where do I find my payment receipts on Arbo?
- When you login into your account on Arbo, at the left of your select “Setting”
- Click on the “Receipts” tab
- Select the receipt you would like to view.
- How do I add products or services on Arbo?
- When you login into your account on Arbo, at the left of your screen, select “Sales & Payments.”
- The submenu will pop up, choose “Products.”
- Click on “Add Products” at the top right of your screen.
- Enter the required details according to your need.
Note: In the type section, we have two options: Buy and Sell. Buy means, as a company, you purchase products that you intend to sell for a later profit. Meanwhile, setting to sell means the product or service is intended to be sold.
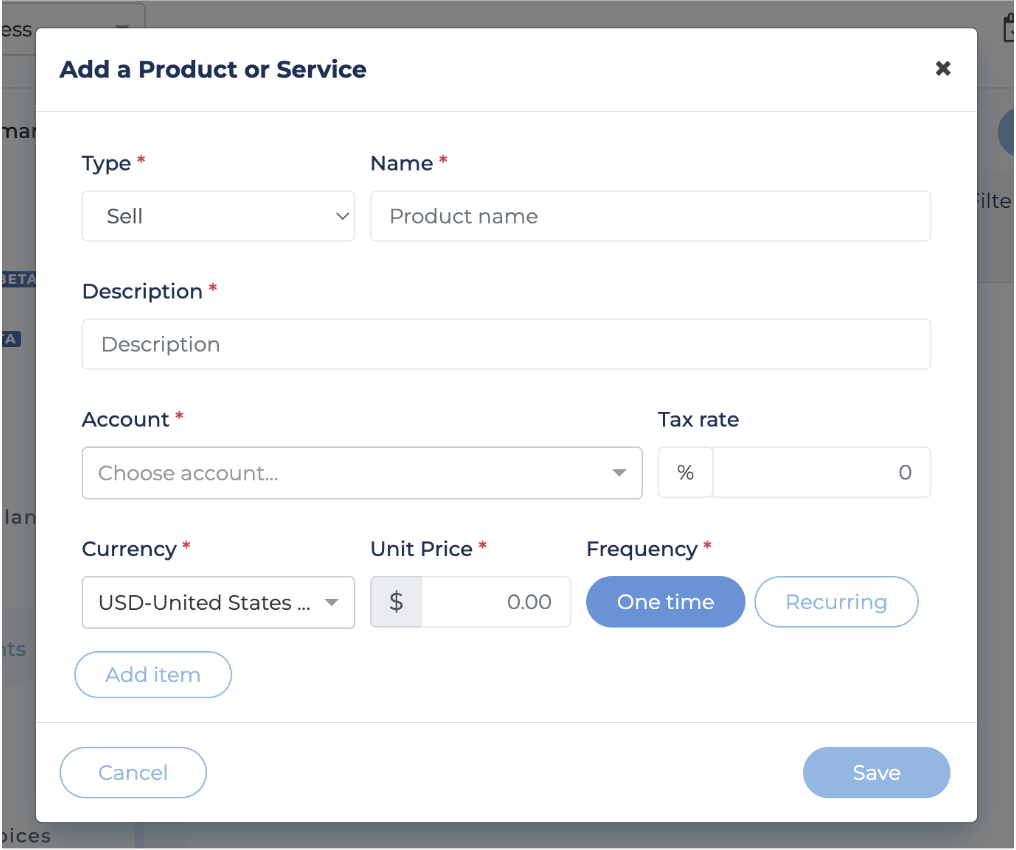
- How do I set up pricing for products or services?
- When you login into your account on Arbo, at the left of your screen, select “Sales & Payments.”
- The submenu will pop up, choose “Products.”
- Click on “Add Products” at the top right of your screen.
- Enter the required details according to your need. To set a recurring price for a particular product in the field “frequency” click on “Recurring”
Invoices
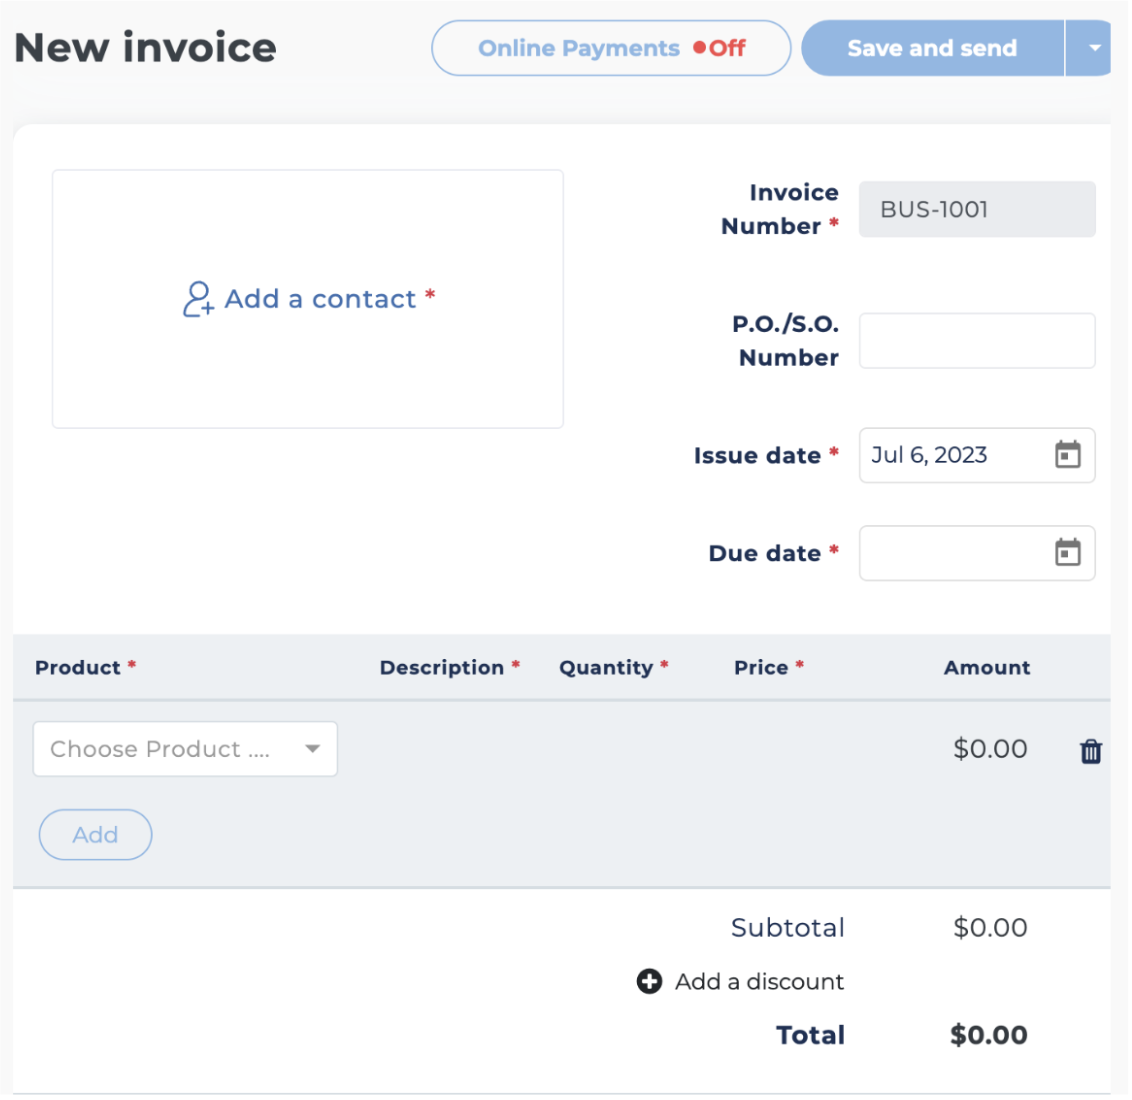
- How do I create an Invoice?
- After signing in, at the left of the screen, amongst all the options, select “Sales & Payments.”
- The submenu will pop up, and select “invoices.”
- At the top right of the screen, click on Create an Invoice.
- Fill in the required boxes (i.e., contact information of the receiver, issue date, due date, product, description, quantity, and price) You can apply a discount if you would like by clicking “Add a discount” and entering the details.
- There is an option to preview the invoice before sent, and the arrow beside “save and send” gives you an option to “save as draft.”
- What is the difference between an invoice and a recurring invoice?
- The difference between Recurring Invoices and One-Time Invoices notifications is determined by whether or not the charge has a billing frequency. For example, a subscription that renews monthly would be considered a recurring invoice, as a new invoice is generated each month.
Purchases
- How do I add products or services under purchases on Arbo?
- When you login into your account on Arbo, at the left of your screen, select “Purchases.”
- The submenu will pop up, choose “Products.”
- Click on “Add Product” at the top right of your screen.
- Enter the required details according to your need.
Note: In the type section, we have two options: Buy and Sell. Buy means, as a company, you purchase products that you intend to sell for a later profit. Meanwhile, setting to sell means the product or service is intended to be sold.
Chats & Docs
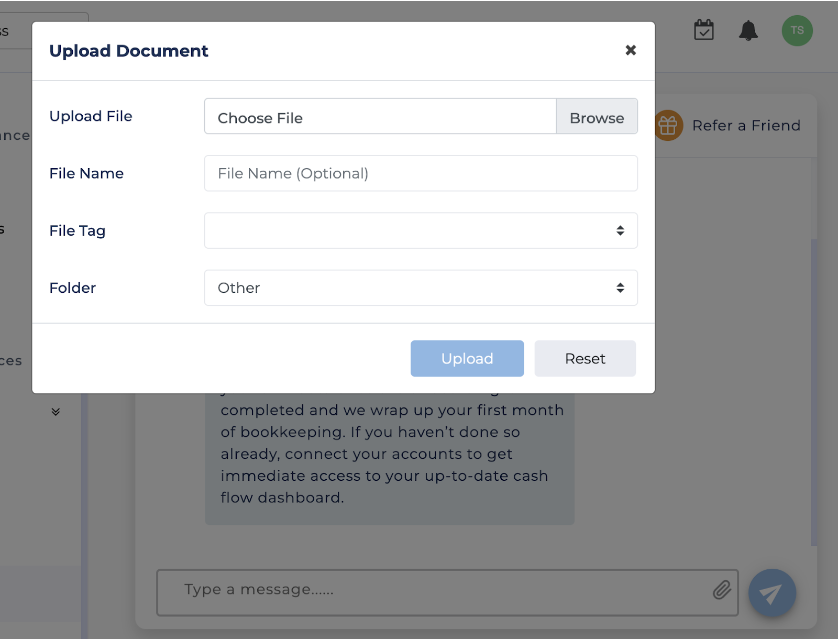
- How do I upload documents for my bookkeeper on Arbo?
- When you login into your account on Arbo, at the left of your screen, select “Chat & Docs.”
- A chat screen will pop up, and at the top right of the screen, there is a document icon in which you will click and select the category in which the file you are about to upload belongs to.
- Select “choose files” and upload the file from your device.
- How do I schedule a meeting with the bookkeeper on Arbo?
- When you login into your account on Arbo, at the left of your screen, select "Chat & Docs.
- At the top right of your screen, click on the calendar icon. This will lead you to your bookkeeper's calendar, where you can find a day and time that works best for you both.
- Upload from the chat box and update file properties
- View documents under the uploaded tab
Reports
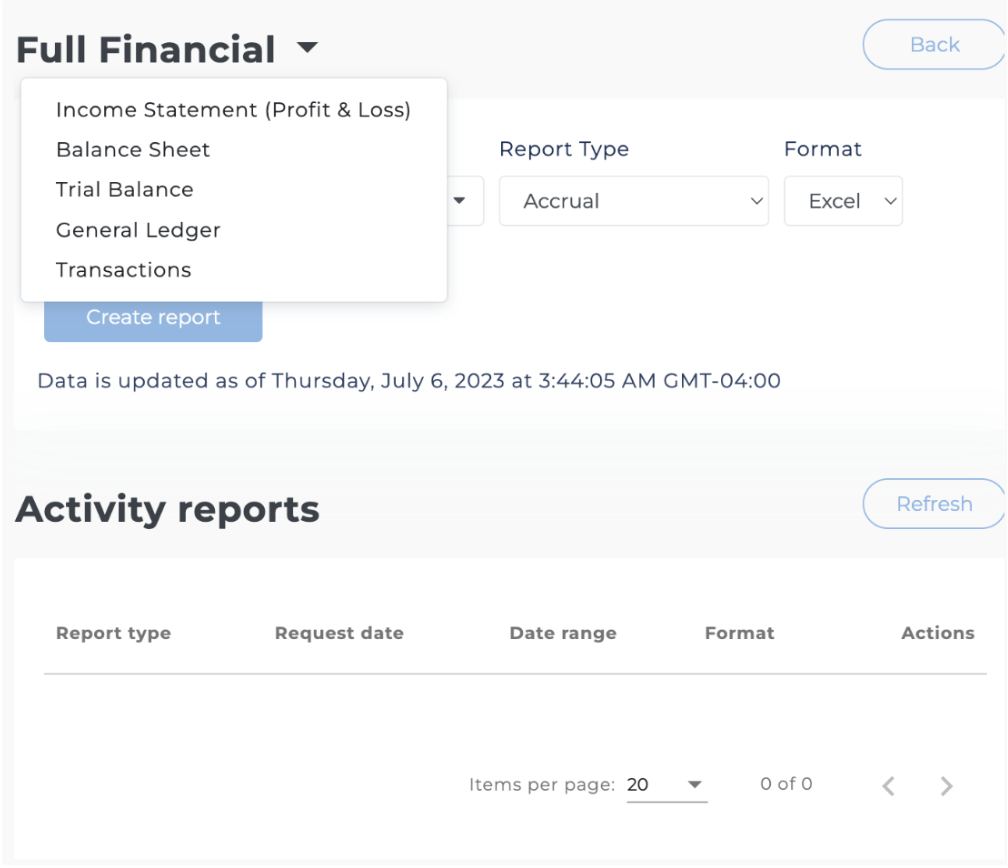
- How do I add reports on Arbo?
- When you login into your account on Arbo, at the left of your screen, select “Reports”
- The page will open, use the drop-down from “Full Financial” on the top left.
- Select from the drop-down the desired report
- Setup “Report Type” from the drop-down o the right of the date modifier
- Seamlessly view the activity reports in your dashboard below
Note: In the report section, we have created the dropdown to toggle between multiple reports from the income statement to the trial balance for your convenience.
- How do I download Arbo's full financial report, income statements, and balance sheet?
Our reports update overnight, but in order to reflect the most recent changes, please click on the “Recalculate” button and follow the instructions below:
Full Financial Report
- When you login into your account on Arbo, at the left of your screen, select “Reports.”
- Click on “Full Financial Report.”
- Customize the date range to your need
- Click on “Create Report”
- Below, In the “Activity Reports,” download to your device the report you just created
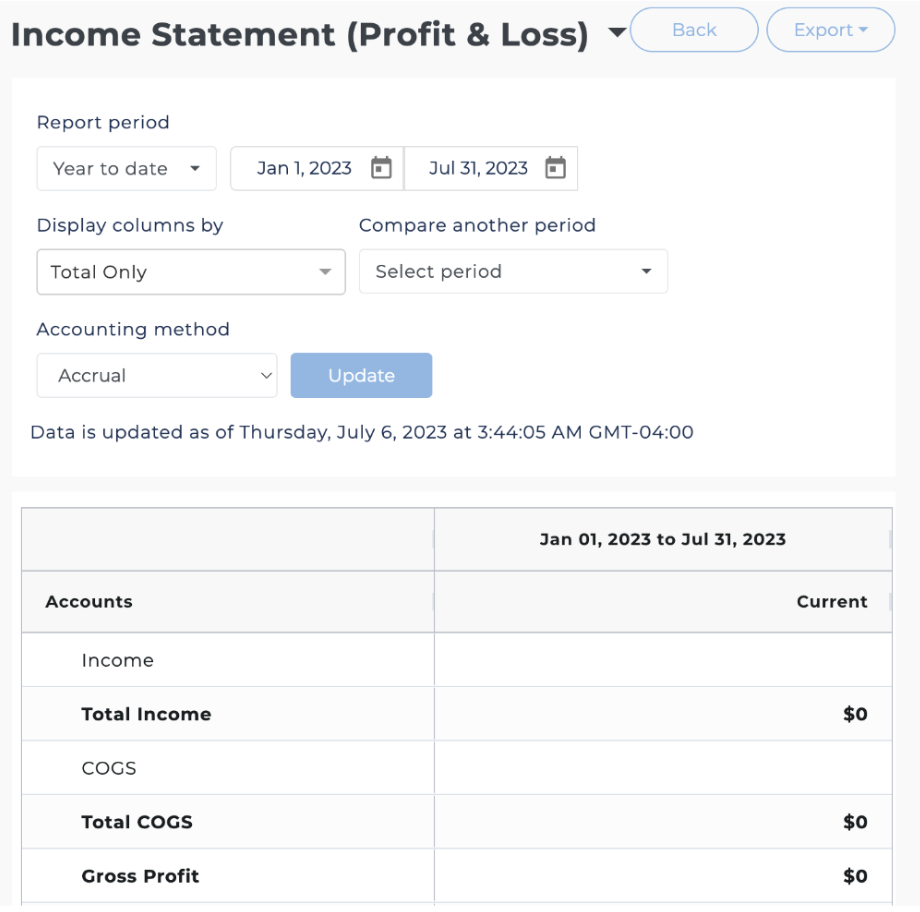
Balance Sheet or Income Statement
- When you login into your account on Arbo, at the left of your screen, select “Reports.”
- Click on “Income Statement (Profit & Loss)” or “Balance Sheet.”
- Customize the date range to your need
- Click on “Update.”
- At the top right of your screen, click on “Export” and select
- How do I categorize transactions on Arbo?
- When you login into your account on Arbo, at the left of your screen, amongst all the options, select “Reports”
- The submenu will pop up, select “Transactions.”
- The list of transactions from every account you connected will appear on the screen, enter the payee (i.e., the company/person who sent the amount to you or the person who will receive the amount you sent)
- Afterward, enter the category according to the charts of the account the transaction belongs to.
Example of how to categorize transactions :
- We have a transaction that happened on 05/09/2022, the transaction is connected to the Chase 5901 account and is described as Google. You must categorize this transaction appropriately for your books to be accurate.

- You will update the payee to “Google” because that is who is on the other end of the transaction.
%20ARBO%20HELP.png?hsLang=en)
- Lastly, according to our charts of account knowledge, google will be categorized as a software expense. This is because we spent money on a Google software product to ease running our company. Therefore, we will go to the space to enter a category and begin typing “software.” “52000-Software” under Expenses will appear, and we will select it.
- How do I get detailed reporting on account transactions (General Ledger) and trial balance on Arbo?
- When you login into your account on Arbo, at the left of your screen, select “Reports.”
- Click on “Account Transactions(General Ledger)” or “Trial Balance”
- Customize the date range to your need
- Click on “Update”
- At the top right of your screen, click on “Export” and select either a CSV or pdf.
Taxes
- How do I get Tax Returns filed on Arbo?
- When you login into your account on Arbo, at the left of your screen, select “Taxes”
- Click on “Tax Return” from the drop-down
- Select the project type between “Business,” “Personal,” and “R&D Credits”
- Follow the questionnaire and answer relevant questions to proceed
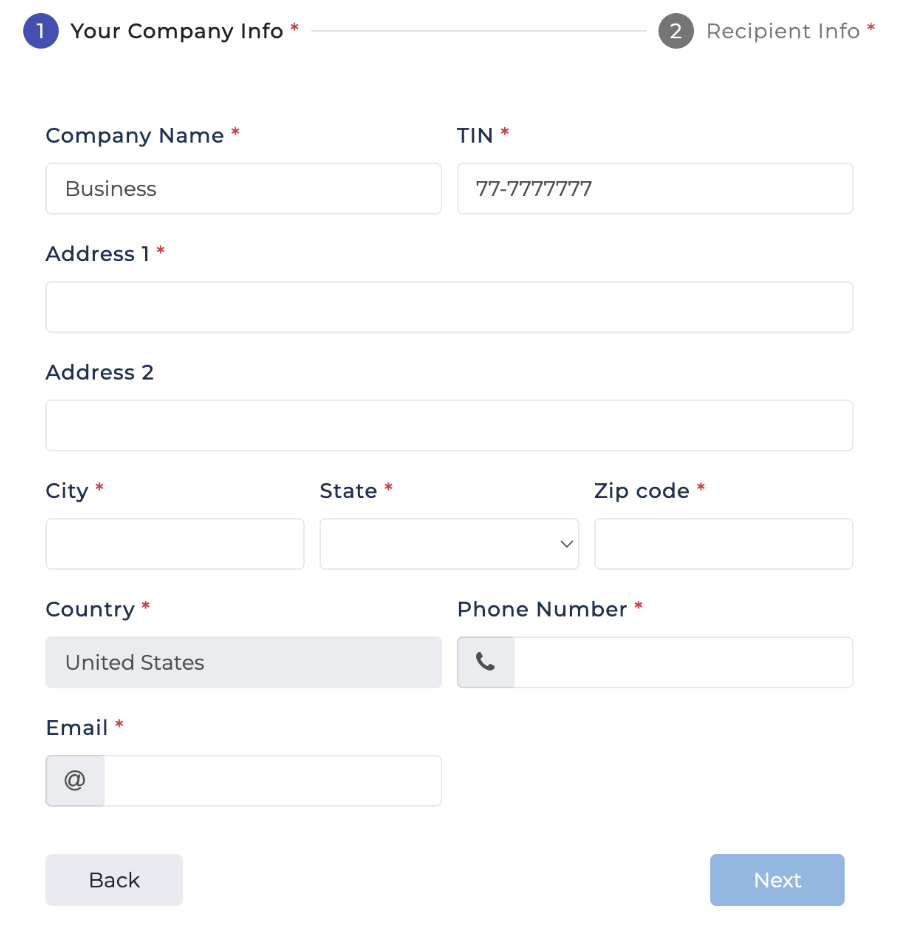
- How do I file 1099s on Arbo?
- When you login into your account on Arbo, at the left of your screen, select “Taxes”
- Click on “1099” from the drop-down
- Click on “Continue your 1099s”
- Add relevant “Company Info” and “Recipient Info” to submit
Bookkeeping Status
- Where can I access my bookkeeping status?
-
- When you login into your account on Arbo, at the left of your screen, select “Bookeping Status”
- Click on the bell icon to see any actions required reflected by the Arbo Team.
- Scroll down to view monthly updates and information.
Settings
- Where can I update company info, contact person info, registered agent info, and shareholders?
-
- When you login into your account on Arbo, at the left of your screen, select “Settings”
- Click on the “Company info” tab
- Update information as needed.